I learned all about straight line quilting with your walking foot from Jacquie Gering and performed the necessary prep of drawing my chevron pattern with an erasable pen. I aim to master free motion quilting, but really I love matchstick and parallel lines best.
When I acquired my Baby Lock Katherine a year and a half ago, I had no idea what I would do with the 100+ different stitches. However, it's been fun playing with all the wavy lines and thread embellishments on my machine. I love each and every 2.5" strip--I used straight-line stitching on the print strips so as not to detract my favorite patterns and played with decorative stitches just on the solid strips to create movement.
Finally all six panels are quilted!
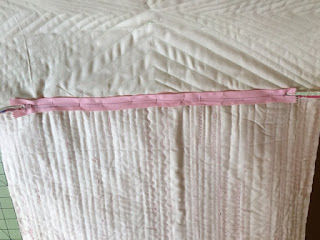
Let the assembly begin! I watched Ashley Nickel's Creativebug on how to install an invisible zipper. I started with the two panels that would have a zipper between them. I basted the panels with 5.0 stitch length and then reduced my stitch length to 2.5 after marking where I would place the zipper. If I make another one of these panels, I would use a 1" seam instead of the .5" seam here (I had already pulled apart my .25" seam). After basting, I pinned the zipper onto the seam.
I didn't do a very nice job installing a zipper in a dog bed, and this zipper install was not a genius reveal with my thread ripper. However, I will totally use this technique again with a few needed tweaks. I hope people will not look too closely at my clumsy zipper installation, which I plan to look a bit more finished with some embroidery thread or a blanket stitch, but I am still pleased with the final result


No comments:
Post a Comment